

League Management
Setting up a league
This guide takes a league from nothing to a published fixture list: creating the league, adding its age groups, setting up a season, approving the clubs that join and the teams they enter, splitting teams into divisions and generating the schedule. It follows a real example — the Thames Valley Junior League's 2026/27 U10 season, with six clubs.
Who can do this
Anyone can create a league. Whoever creates it becomes its owner and league admin, and every step below is done by a league admin. The only part that isn't is joining: each club asks to join your league and enters its own teams from the club's side — you approve both.
1. Create the league
Add a Football League organisation
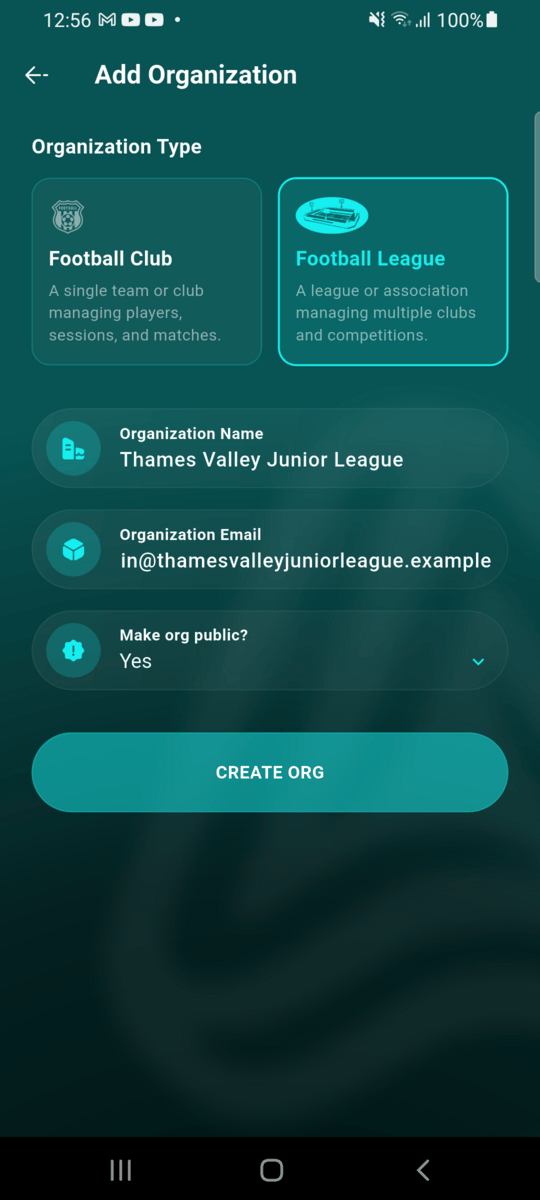
Go to Orgs and tap the round + button. Choose Football League as the organisation type, enter the league's name and contact email, choose whether it's public, and tap Create Org.
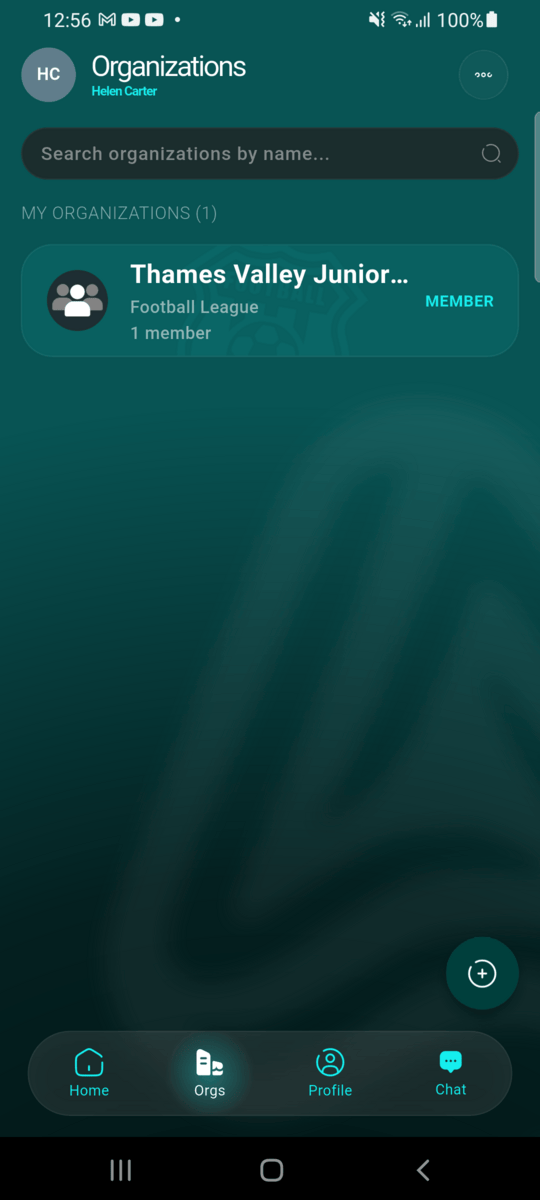
The league appears under My Organizations
Tap it to open the league. A league has its own tabs — Seasons, Clubs, Schedule, Standings and Settings among them.
2. Add age groups
Open Settings → Age Groups
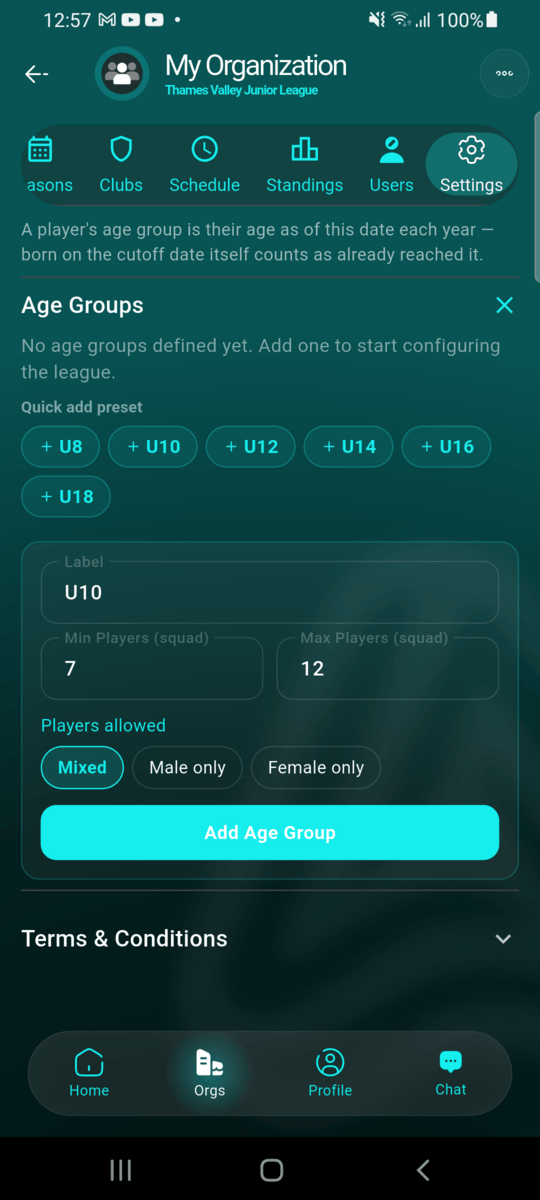
In the league's Settings tab, scroll to Age Groups and tap + (or tap a quick preset such as + U10). Enter a label and, optionally, the minimum and maximum squad size. Under Players allowed, choose Mixed, Male only or Female only, then tap Add Age Group.
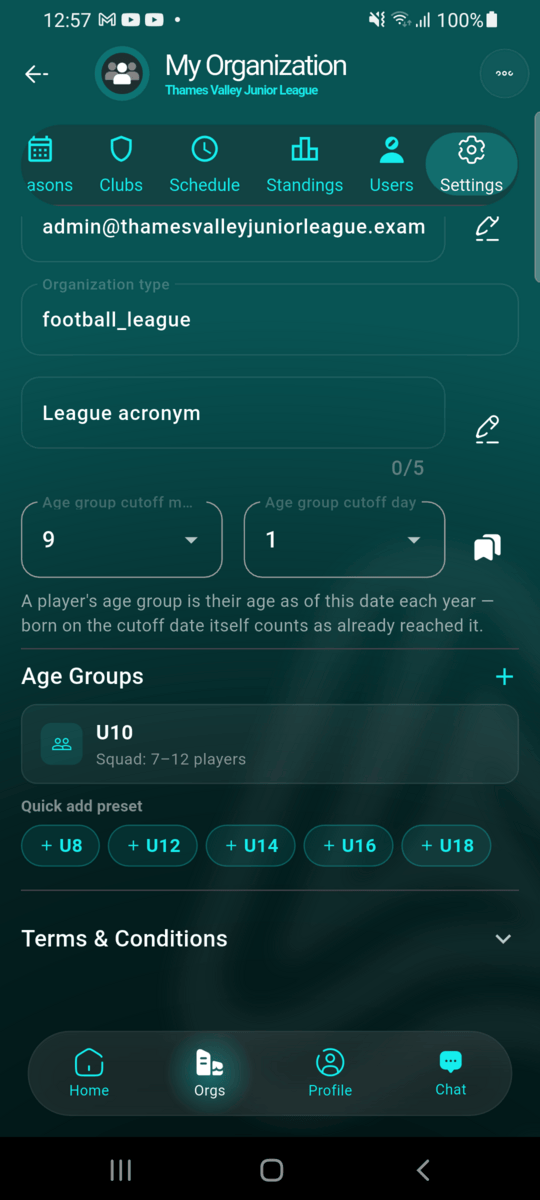
The age group is listed
Repeat for every age group the league runs. Each one shows its squad size (and any male-only or female-only restriction) in the list.
3. Create a season
Start a new season
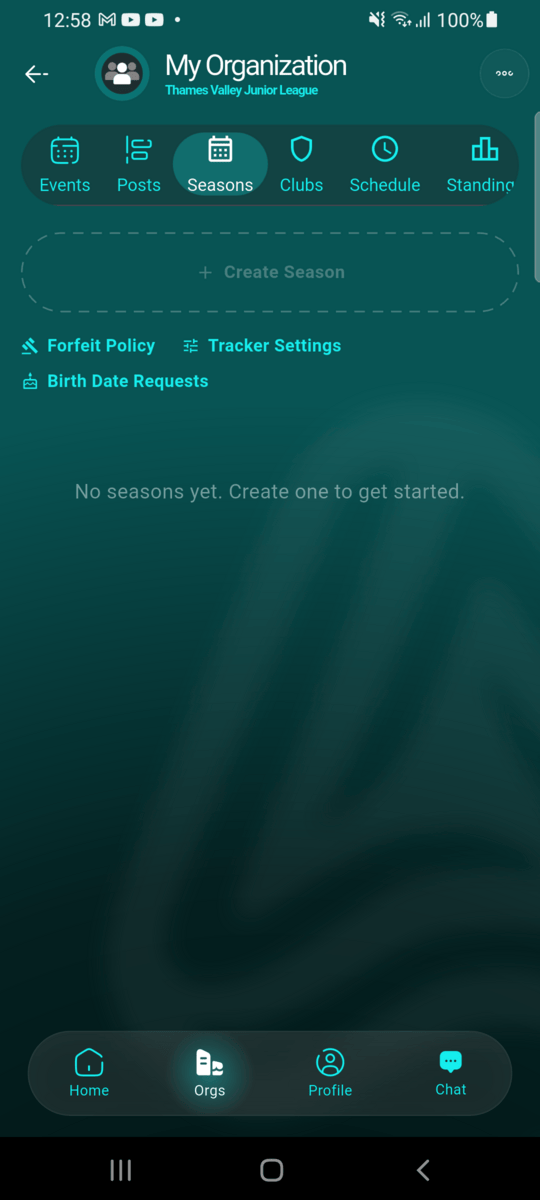
Open the Seasons tab and tap Create Season.
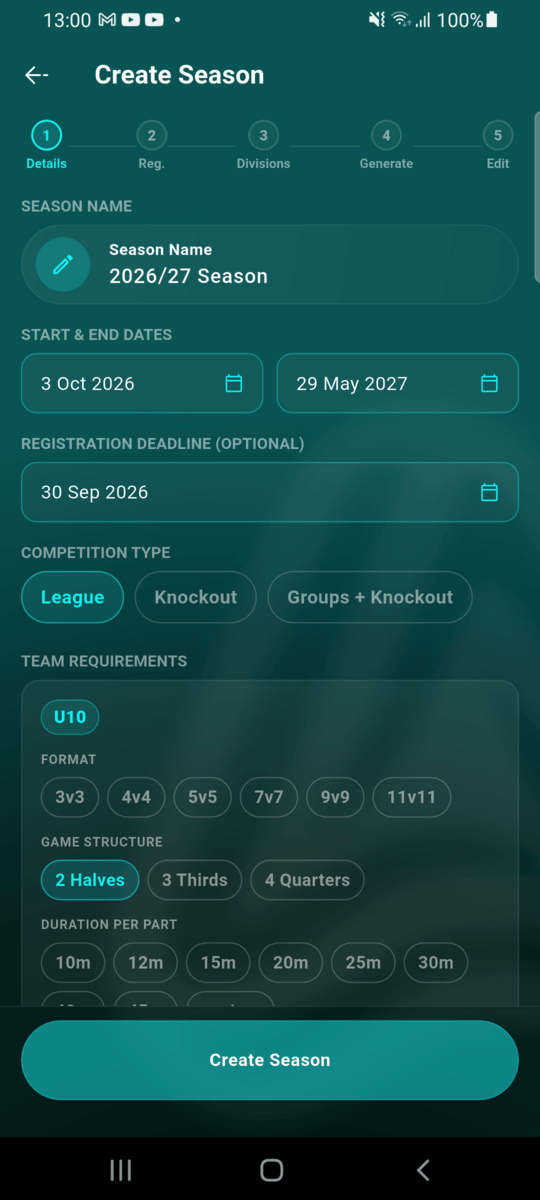
Name, dates and competition type
Enter the season's name, its start and end dates and, optionally, a registration deadline — the last day clubs can enter teams. Then choose the competition type: League (every team in a division plays each other), Knockout (a cup) or Groups + Knockout.
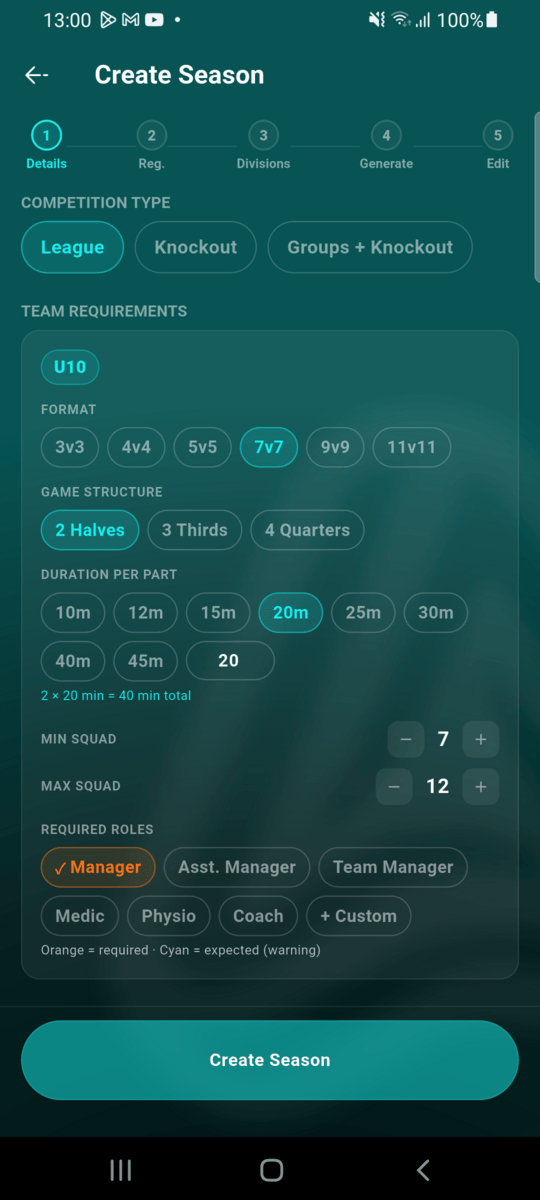
Set each age group's team requirements
For every age group, choose the match format (3v3 up to 11v11), the game structure (halves, thirds or quarters) and the duration per part, and check the squad size. Under Required roles, tap a role once to make it required (orange — a team without it fails the check) or twice to make it expected (cyan — shown as a warning only). Tap Create Season.
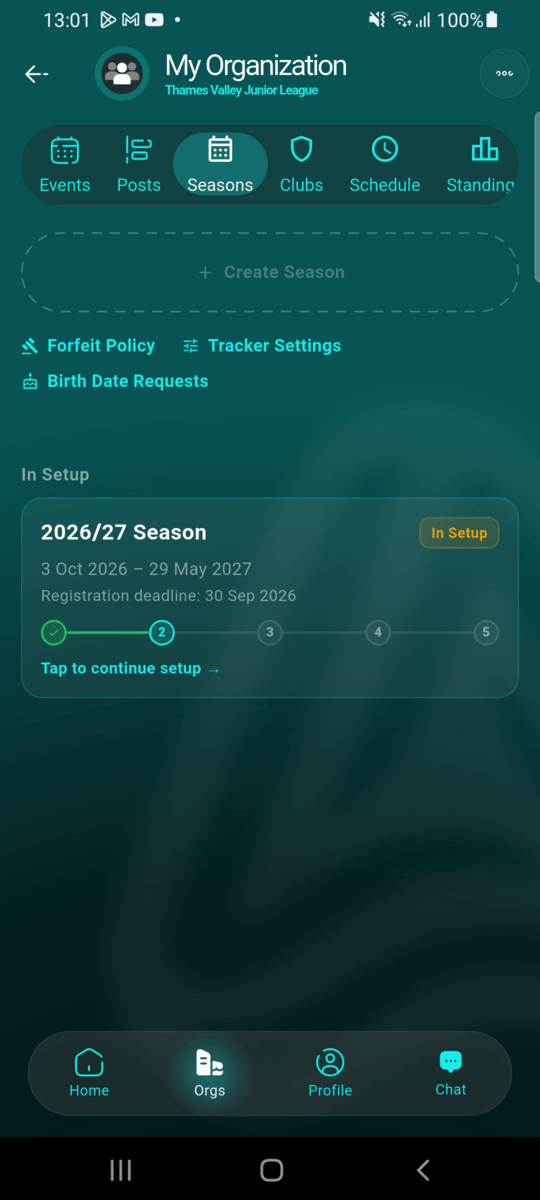
The season is In Setup
The season card shows its progress through the five setup steps. Clubs can enter teams from now until the registration deadline or until you close registration, whichever comes first. Tap Tap to continue setup whenever you're ready to carry on.
4. Approve the clubs that join
Clubs ask to join
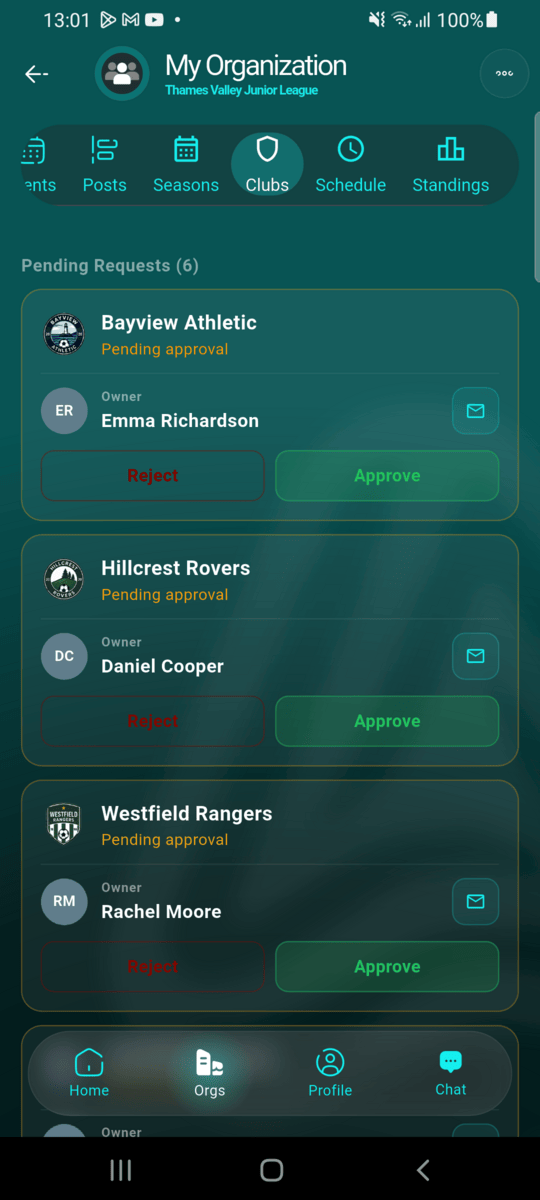
Each club finds your league and requests to join it from their own club. Requests wait in your league's Clubs tab under Pending Requests, with the club's owner shown so you know who's asking.
Approve each club
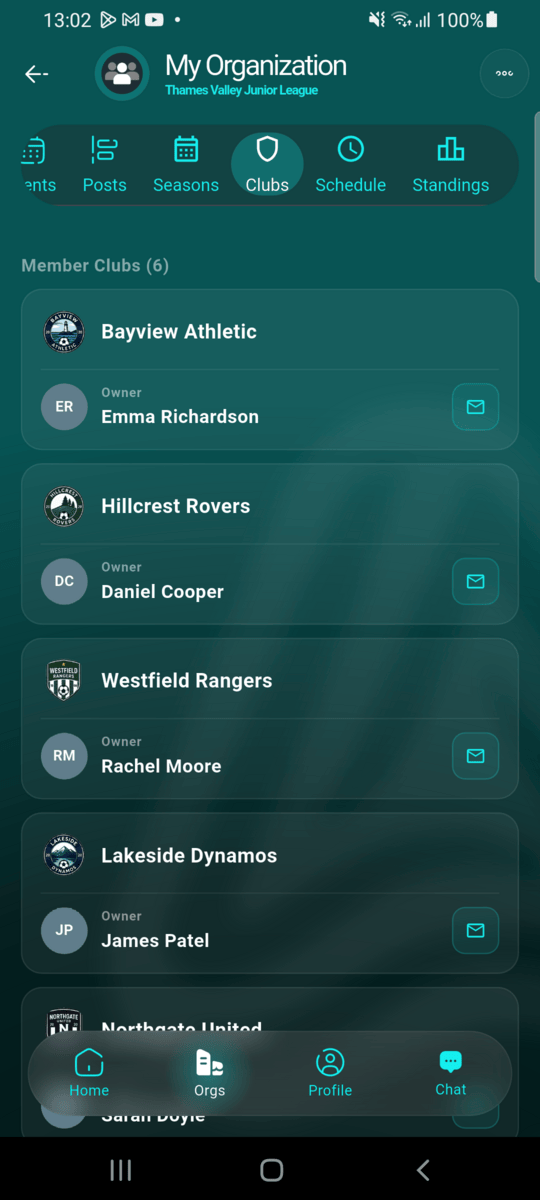
Tap Approve (or Reject) on each request. Approved clubs move to Member Clubs and can enter teams into your seasons.
5. Season setup
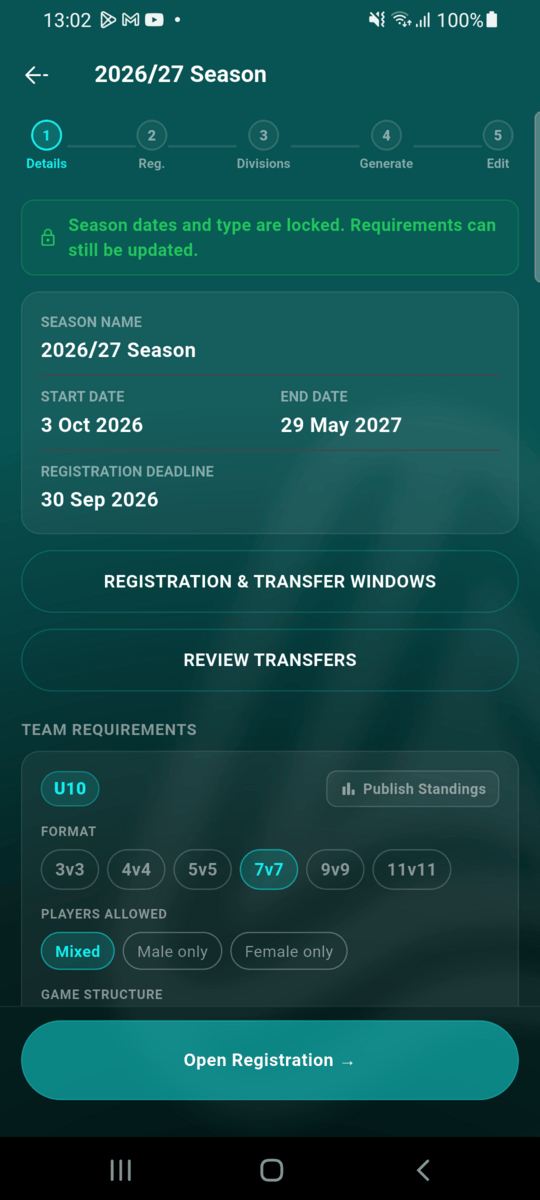
Opening a season in setup takes you through five steps — Details, Reg., Divisions, Generate and Edit — shown as a progress bar at the top. You can leave and come back at any point.
Details
The season's name, dates and competition type are locked once it's created, but each age group's requirements can still be updated here. This step also holds the Registration & Transfer Windows and Review Transfers buttons. Tap Open Registration → to move on.
Registration: review and approve squads
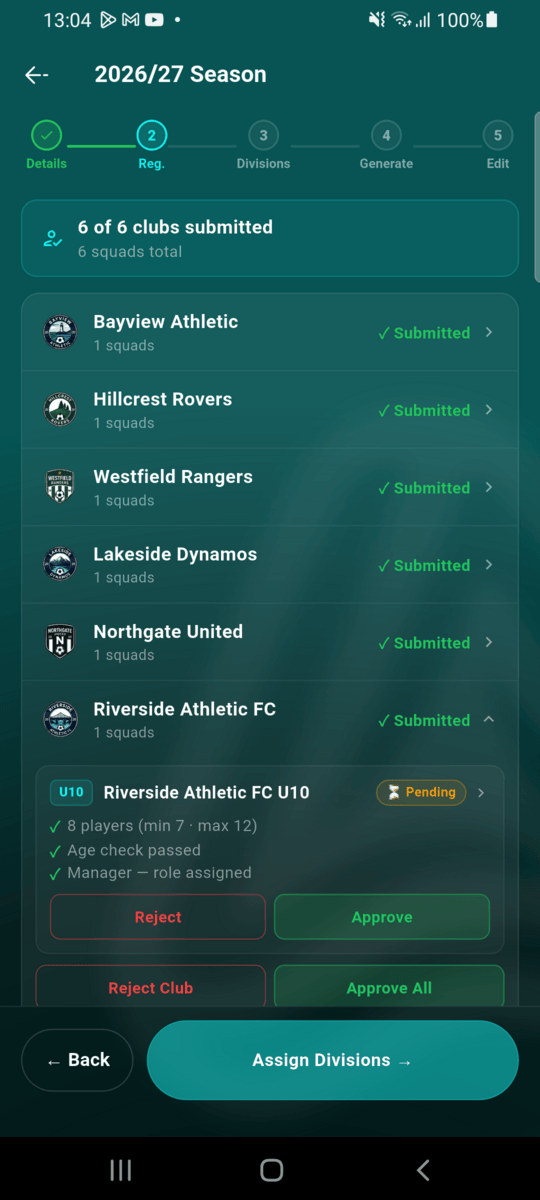
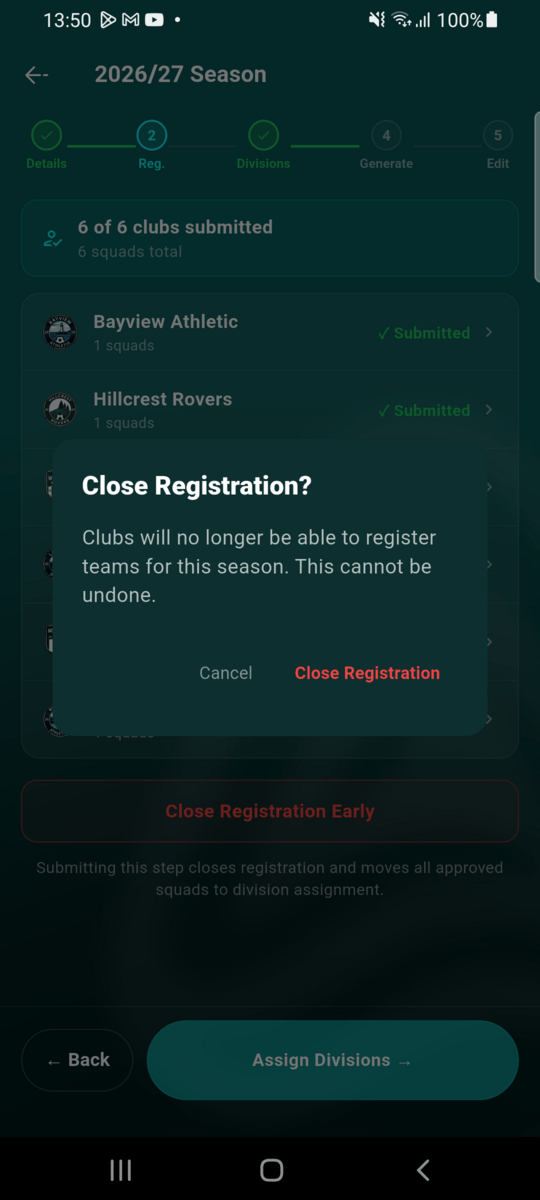
Every member club is listed with the squads it has entered. Tap a club to see each squad checked against the season's requirements — player count within the squad size, every player the right age for the age group, and required roles assigned. Approve or Reject each squad, or use Approve All / Reject Club for everything a club entered. When you're done, tap Assign Divisions → — this closes registration (you'll be asked to confirm), so no more teams can be entered. To stop new entries without moving on yet, use Close Registration Early.
Divisions: group the teams
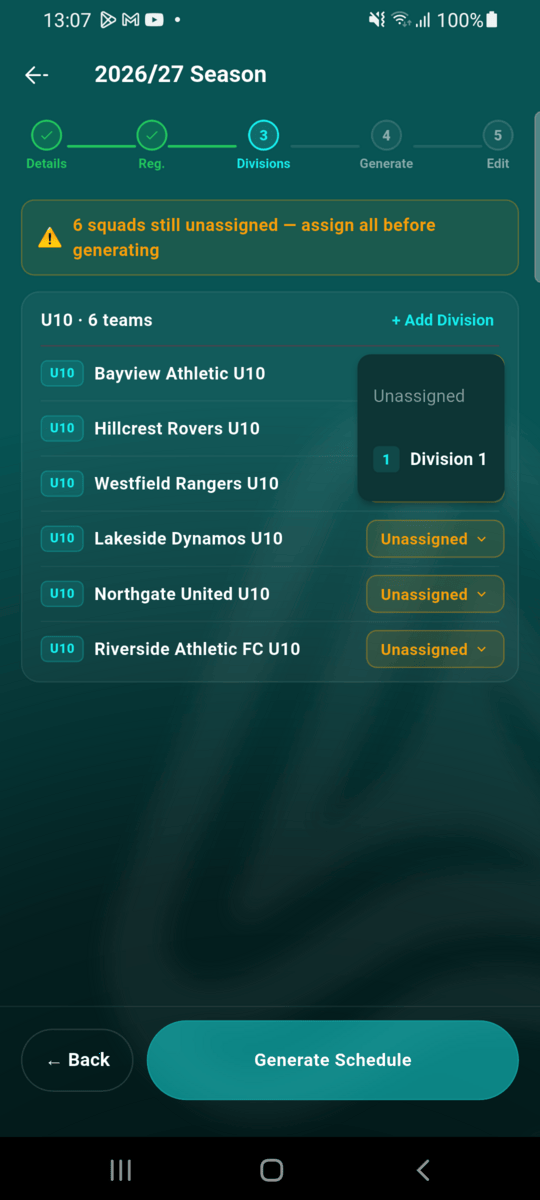
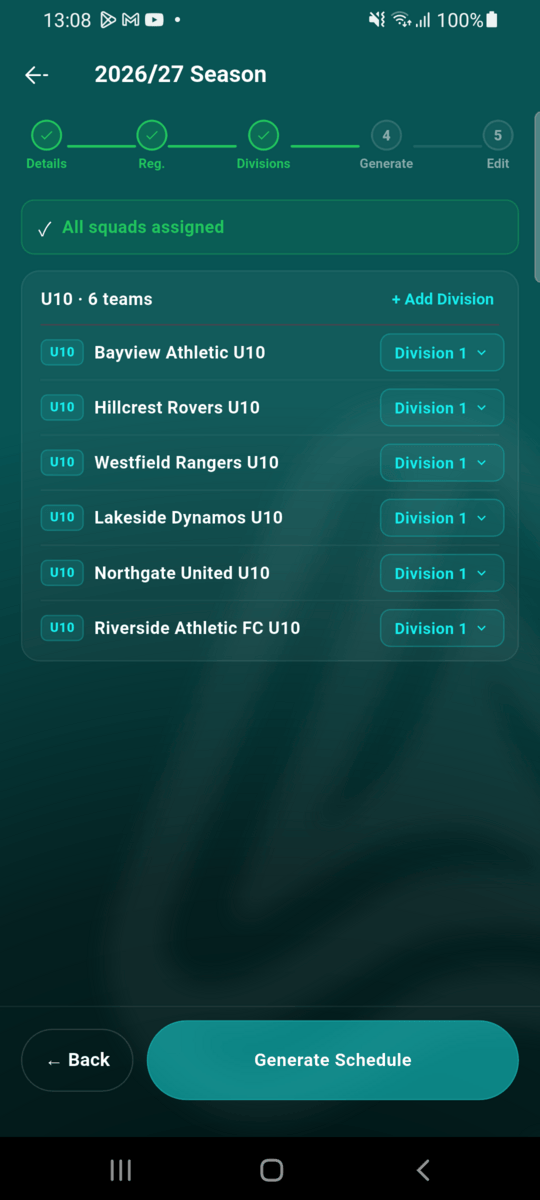
Tap + Add Division for each division you want in an age group — give it a name and a rank (1 is the top division). Then use the menu next to each team to put it in a division. Teams in the same division play each other; every approved team must be assigned before the schedule can be generated.
Generate: build the fixture list
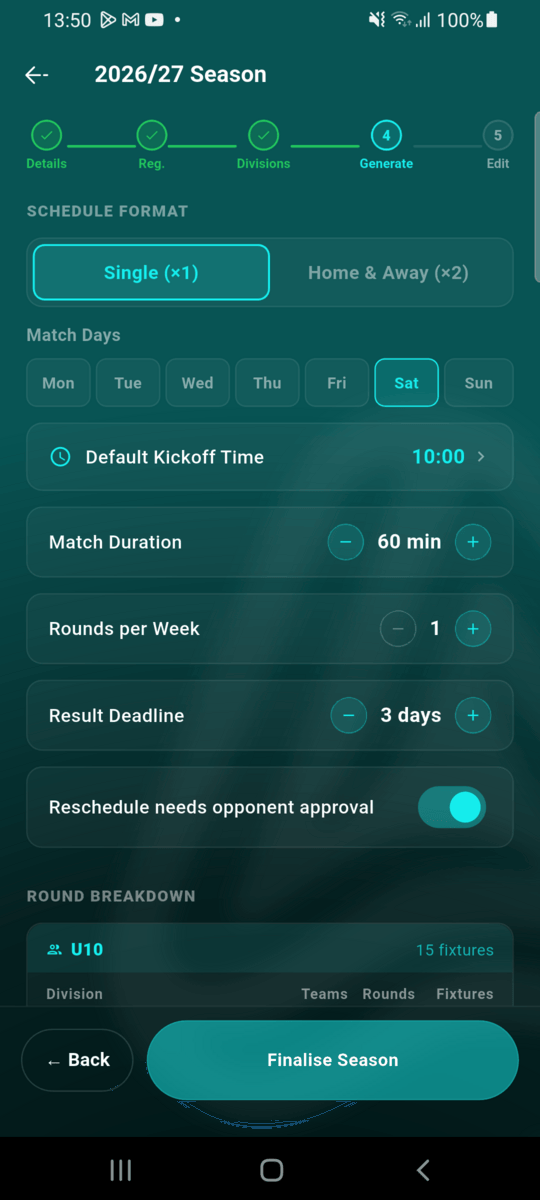
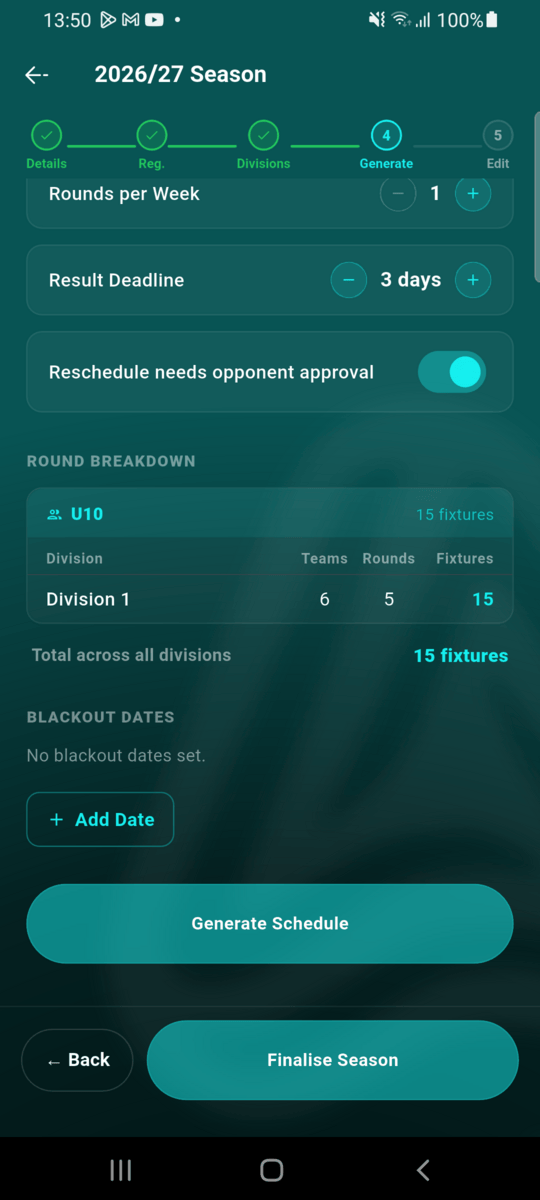
Choose whether teams meet once (Single) or twice (Home & Away), the days matches are played, the default kickoff time, match duration, how many rounds are played per week, how many days clubs have to submit results, and whether rescheduling a fixture needs the opponent's approval. The kickoff time is local time where you are, and stays the same across clock changes. Add any blackout dates (half-term, bank holidays) and no rounds are scheduled on them. The Round breakdown shows how many rounds and fixtures each division will get. Tap Generate Schedule.
Edit: review and start the season
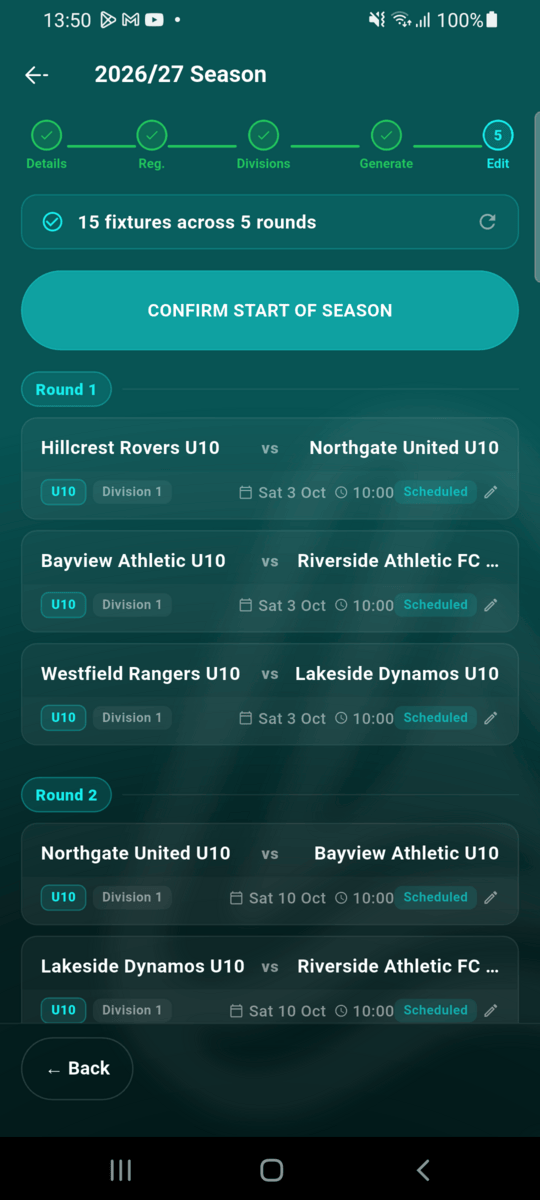
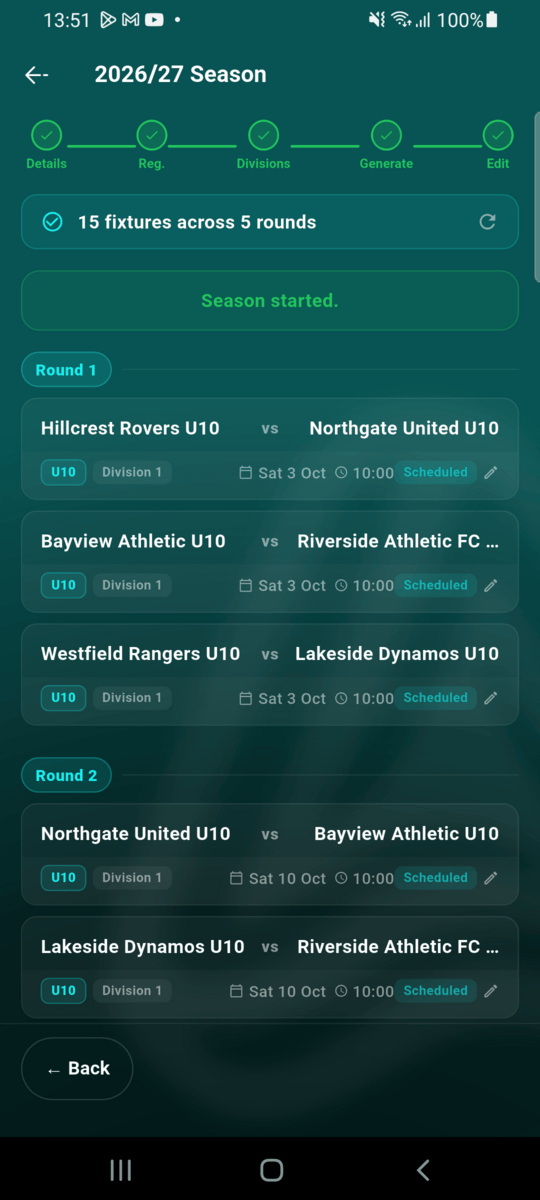
Tap Finalise Season to see every fixture, round by round. Use the pencil on a fixture to move it to a different date or time. When the fixture list is right, tap Confirm Start of Season and the season moves from In Setup to active. Clubs already see their fixtures in their own calendars from the moment the schedule is generated.
What clubs see
Once a club's team is approved, the club follows the season from its own League tab: its fixtures, results and — once you publish them — the standings. From there, club admins also report forfeits and propose player transfers, which come back to you for a decision.